Understanding Finish Trim: Types, Styles, and Applications
1.1 Common Types of Finish Trim and Their Uses
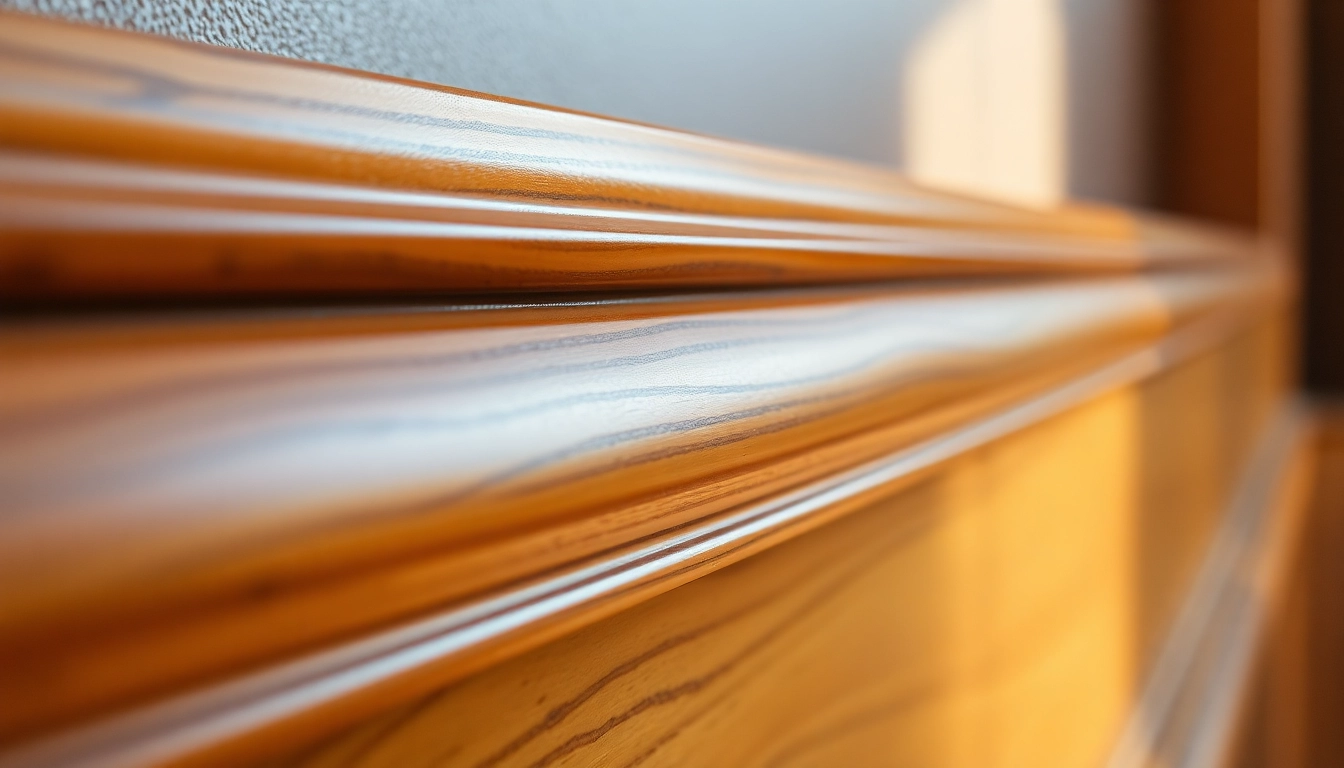
Finish trim, also known as molding or casings, is an essential element in interior design that seamlessly bridges functional and aesthetic needs.
These various types serve specific purposes, enhancing the visual appeal and structural integrity of a space.
The most common types include baseboards, crown molding, door casings, window trim, and chair rails.
Finish trim in these forms helps to hide imperfections where walls meet floors, ceilings, or other structural elements, offering a polished look that elevates the overall ambiance.
Let’s explore these types in detail:
- Baseboards: Installed at the junction of walls and floors, baseboards protect walls from scuffs and damage and create a finished appearance. They come in various profiles, from simple flat designs to ornate, decorative styles.
- Crown Molding: Located at the intersection of walls and ceilings, crown molding adds elegance and visual height to a room. It is available in diverse profiles and materials to match modern or traditional aesthetics.
- Door and Window Casings: These trims frame doorways and windows, providing a clean transition from the frame to the wall surface. They also help to cover gaps and rough edges resulting from framing or drywall installation.
- Chair Rails and Picture Rails: Installed horizontally along walls, these trims protect walls from furniture and can serve as decorative elements, adding character and architectural interest.
1.2 Popular Styles and How to Choose the Right Finish Trim
Selecting the right style of finish trim is crucial to achieving your desired aesthetic, whether modern, traditional, rustic, or eclectic. The style should complement the overall interior design theme and marry well with other architectural elements.
Traditional vs. Modern
- Traditional styles: Often feature intricate profiles, ornamental carvings, and detailed moldings. Popular in historic or classic interior designs, these trims can include elaborate crown moldings and decorative baseboards.
- Modern styles: Favor clean lines, minimal profiles, and simple geometric shapes. Flat or chamfered trims work well in contemporary settings where sleekness and simplicity are key.
Guidelines for Choosing
- Room function: High-traffic or utilitarian areas (kitchens, basements) may benefit from durable, low-maintenance trims, whereas formal living spaces can accommodate more ornate styles.
- Ceiling height: Taller ceilings can support larger, more elaborate moldings, while lower ceilings warrant slimmer profiles to prevent a cramped feel.
- Material harmony: Match trim materials with other wood or finish elements for consistency.
- Color schemes: Decide whether to paint trim the same color as walls or in a contrasting hue for emphasis. Light-colored trims against dark walls create a striking look, and vice versa.
1.3 Material Options for High-Quality Finish Trim
Material choice substantially impacts durability, ease of installation, appearance, and cost of your finish trim.
Here are the most prevalent options, rated for quality and application suitability:
Wood
Traditional and versatile, wood remains a favorite for its natural beauty and ease of customization. Popular species include pine, oak, maple, and alder. Solid wood offers excellent durability, but it may be more expensive and susceptible to warping if not properly installed and finished.
Medium-Density Fiberboard (MDF)
This engineered wood provides a smooth surface ideal for painting and intricate profiles. MDF is less expensive than solid wood, resistant to cracking, and less prone to warping, making it popular for modern applications and affordable renovations.
PVC and Vinyl
These synthetic materials are highly resistant to moisture, making them suitable for bathrooms, kitchens, or exterior projects. They require minimal maintenance and can imitate wood finishes, although they lack the warmth of natural wood.
Polyurethane and Resin
Lightweight and easily molded into detailed shapes, these materials are excellent for decorative trims and ornate profiles. They are durable and low maintenance, often used in custom or high-end applications.
Choosing the right material
Opt for wood or MDF in interior spaces where paint or stain is desired, with MDF being preferable for budget-friendly projects. For exterior or moisture-prone areas, PVC, vinyl, or resin trims offer enhanced longevity. Consider the specific needs of each room, budget constraints, and the desired aesthetic to make an informed choice.
2. Preparing for a Flawless Finish Trim Installation
2.1 Tools and Materials Needed for Precise Work
Achieving a professional finish trim installation hinges on selecting the proper tools and materials. Meticulous preparation minimizes errors and ensures a seamless outcome.
Essential tools include:
- Miter saw: For precise angled cuts, especially for corners and intricate moldings.
- Measuring tape and ruler: For accurate measurements to prevent gaps.
- Pencil and marking tools: For marking cut lines clearly.
- Level and square: To align trim perfectly and maintain consistent heights.
- Nail gun or finishing nails: For securing trim efficiently.
- Hammer and pry bar: For adjustments and removal of old trims.
- Sandpaper and putty knives: To smooth out surfaces and fill nail holes.
- Caulking gun and adhesive: For sealing gaps and securing delicate trims.
Having high-quality, sharp blades and setting tools correctly is vital for clean cuts and tight joints.
2.2 Surface Preparation and Measurement Techniques
Before installing finish trim, ensure that surfaces are clean, dry, and smooth. Remove existing moldings, fill imperfections, and sand rough patches to create a flat, even base.
Precisely measuring and marking is the backbone of a professional-looking installation.
Measurement tips:
- Use a reliable tape measure to record lengths from multiple reference points, accounting for room irregularities.
- Always measure twice before cutting, to avoid costly mistakes.
- For segments requiring angled cuts, measure the angle directly on-site and transfer it accurately to your miter saw.
Techniques:
- Use a story stick or a chalk line for consistent heights and profiles across multiple walls.
- Practice cutting on scrap pieces to perfect angles and fitments before making final cuts.
- Mark cut lines clearly and double-check measurements to ensure accuracy.
2.3 Tips for Aligning and Securing Trim Efficiently
Proper alignment and secure fastening are key to a polished finish.
Alignment tips:
- Use a level to check vertical and horizontal positioning during installation.
- Apply light adhesive to prevent slipping during nailing or screwing.
- Temporarily hold pieces in place with clamps if needed before fixing permanently.
Securing tips:
- Nail or screw trim into wall studs or framing for optimal stability.
- Use finishing nails for less visible fixing points; countersink nails to facilitate filling and sanding.
- Verify spacing between fasteners to avoid sagging or warping over time.
- Fill nail holes with quality wood filler or painter’s putty, then sand smooth for an impeccable surface.
Attention to detail during securing guarantees longevity and prevents future issues like cracking or separation.
3. Best Practices for Painting and Finishing Trim
3.1 Selecting the Right Paint and Sheen for Finish Trim
The visual appeal and durability of your finish trim largely depend on choosing suitable paint and sheen.
High-quality paints, such as Benjamin Moore Aura Interior Latex, are recommended for their rich coverage and longevity.
Sheen options include:
- Semi-gloss: Preferred for trim, doors, and windows due to its durability and easy cleaning.
- Glossy: Offers maximum reflectivity but can highlight surface imperfections if not applied flawlessly.
- Satin: Slightly less reflective, providing a softer finish suited for areas where a subtle shine is desired.
Avoid flat paints on trim as they tend to be less durable and harder to clean, especially in high-traffic areas.
3.2 Techniques for Achieving a Smooth, High-Quality Finish
Attaining a flawless paint finish on trim involves meticulous preparation and application:
- Surface priming: Apply a quality primer to seal porous surfaces and promote adhesion.
- Sanding: Lightly sand after priming to smooth out rough spots and create a uniform surface.
- Application methods: Use high-quality brushes or rollers designed for trim to minimize brush strokes and bubbles.
- Layering: Apply multiple thin coats rather than a single thick layer to ensure even coverage and bleeding under the paint.
- Drying and curing: Allow adequate drying time between coats, and avoid heavy handling until fully cured.
For a mirror-like surface, consider using a sprayer or finishing techniques like wet sanding between coats.
3.3 Common Mistakes to Avoid During Painting
Even experienced DIYers can encounter pitfalls during trim painting:
- Applying thick or heavy coats that lead to drips and uneven texture.
- Skipping surface prep, which results in poor adhesion and visible imperfections.
- Failing to tape edges properly, causing paint to bleed onto walls or floors.
- Using low-quality brushes or rollers that leave marks or bristles in the finish.
- Not allowing sufficient drying time, which may cause smudges or streaks.
Recognizing and avoiding these mistakes enhances the professional look of your finished project.
4. Enhancing Durability and Aesthetics of Finish Trim
4.1 Sealing and Protecting Your Trim
To extend the lifespan of finish trim and maintain its appearance, sealing and protective coatings are critical.
Clear polyurethane finishes or epoxy sealers can be applied over painted or stained trim,
providing resistance to scratches, moisture, and UV damage.
For interior trims, a high-quality water-based polyurethane offers durability with minimal yellowing.
For exterior or high-moisture environments, consider marine-grade sealants or specially formulated weatherproof coatings.
Proper application involves:
- Ensuring the surface is clean and dry.
- Applying thin, even coats with brushes or sprayers.
- Allowing recommended drying time between coats.
- Sanding lightly between coats for a smooth finish.
4.2 Accent and Customization Ideas
Customizing finish trim can dramatically change a room’s character. Some popular options include:
- Two-tone paint schemes: Painting the trim in a contrasting color from the walls creates a bold statement.
- Decorative inlays: Incorporating rosettes, medallions, or patterns within trim profiles for added visual interest.
- Stenciling and carving: Adding intricate designs or textures to elevate traditional or eclectic decor styles.
- Lighting integration: Embedding LED strips or accent lighting along crown moldings for modern ambiance.
These ideas allow homeowners and designers to personalize spaces while maintaining elegance and sophistication.
4.3 Maintenance Tips for Long-Lasting Elegance
Proper maintenance extends the beauty and integrity of finish trim:
- Regular dusting and cleaning with a soft cloth or gentle vacuum brushing to remove dirt and prevent buildup.
- Occasional touch-up painting or staining to address scuffs, scratches, or fading.
- Re-sealing or re-coating every few years based on wear and environmental exposure.
- Addressing any damage or moisture issues promptly to prevent warping or peeling.
Implementing consistent upkeep ensures your finish trim continues to impress for years to come.
5. Advanced Techniques and Trends in Finish Trim
5.1 Modern Interior Design Trends Incorporating Finish Trim
Contemporary interiors are redefining how finish trim is utilized, favoring sleek lines, minimal profiles, and innovative materials.
Trending themes include:
- Flat and flush trim: Creating a seamless, modern look where trim blends subtly into walls and ceilings.
- Wide baseboards and chunky moldings: Making bold statements with larger profiles that add drama and presence.
- Mixed materials: Combining wood, metal, and composites for industrial chic or eclectic style.
- Colorized trims: Using contrasting or unexpected colors for trims to add personality and trendiness.
Keeping abreast of these trends helps homeowners and designers craft spaces that are stylish and timeless.
5.2 Creative Use of Finish Trim in Renovations
Innovative applications of finish trim can dramatically transform interiors:
- Tray ceilings: Framing with decorative moldings to highlight architectural features.
- Wainscoting and wall paneling: Using trim to create textured wall surfaces that add depth and character.
- Room dividers: Incorporating trim into open-plan spaces for visual separation.
- Feature walls: Framing artwork or incorporating decorative trims for focal points.
These methods allow for personalization and can significantly increase property appeal.
5.3 Professional Tips from Experienced Contractors
Experts advise several best practices to elevate finish trim projects:
- Invest in quality tools and materials to ensure precision and longevity.
- Plan detailed measurements and cut lines, avoiding rushed or improvised cuts.
- Employ high-quality adhesives and fasteners appropriate for each material.
- Focus on seamless joints with accurate miter cuts, utilizing jigs or templates for consistency.
- Pay attention to subtle details like nail hole filling, sanding, and paint touch-up for a professional look.
Continuous learning and technique refinement are vital in mastering finish carpentry and trim installation.